Introduction
Installing a motherboard seems to be very easy, but there are many tricks involved in the process. If your motherboard isn't correctly installed you will face problems like overheating and system crashes (computer "freezing", "locking", "reseting" – you name it). This tutorial is a step-by-step guide on how to correctly install your motherboard, avoiding such troubles.
Matching Holes
The motherboard is installed in the computer case. The first step is to open the case and locate the metallic plate where the motherboard is screwed to. Normally this plate can be removed from the case by unscrewing it from the back end of the case and sliding it. You must remove it from the case to install the motherboard on it. This plate has several holes, as you can see below

The motherboard also has several holes, as you can see below (we've drawn red arrows to point you where the holes are located).
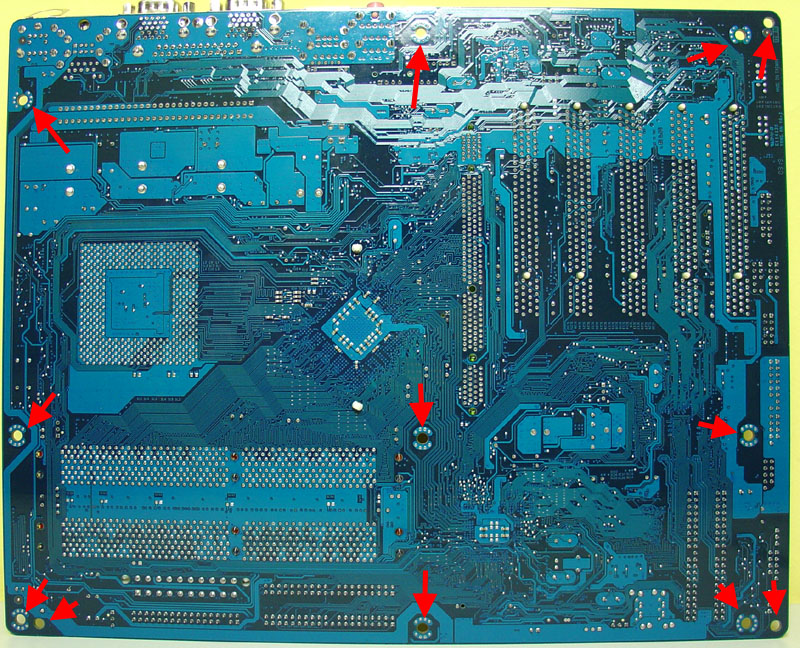
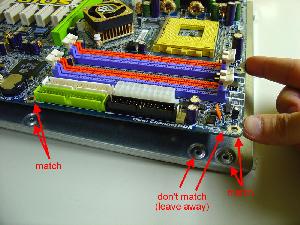
You should lay down the motherboard on the metallic plate and check which holes from the metallic plate match the holes on the motherboard, as we show below. As you can see by comparing the metallic plate has more holes than needed. On the holes on the metallic plate that matched a hole on the motherboard, you will install a nut screw (more on that in a few moments). On the holes that don't match a hole on the motherboard, you will simply leave it away. Sometimes you will find some holes on the motherboard that don't match any hole on the plate. That's normal too. you can see a hole on the motherboard that doesn't match any hole on the plate
Together with the case come a lot of small pieces. From these pieces you will need screws and screw nuts to install the motherboard. For now, take the screw nuts and install them on all the plate holes that matched a hole on the motherboard. They can be easily installed by turning them clock wise using your thumb and index finger.

No comments:
Post a Comment