Tuesday, November 20, 2012

Laptop screen shows strange colors.

The main step is testing how laptop outputs video on an external monitor (or TV).
You can connect your laptop to an external monitor using VGA cable, DVI cable, HDMI cable or S-Video cable, it depends on a type of connector you have on the laptop. Most laptops have VGA connector, so it would be the most common way to connect.
In my example I’m connecting to an external monitor via VGA connector
ome laptops detect external monitor automatically and start showing image on both screens right from startup.
Other laptops can detect the monitor but display image only on one screen (internal or external). In this case you’ll have to switch video between internal and external using the Fn key and one of the F* keys in the top row of the keyboard. This combination varies for different laptop brands, for example it’s Fn+F5 for Toshiba, Fn+F4 for HP, Fn+F8 for Dell, Fn+F7 Lenovo etc…
If both, the internal screen and external monitor (or TV) show strange or incorrect colors or any other image distortion, this is the graphics card failure.
If only the laptop screen shows strange colors or any other distortion but external image appears to be normal (as in my example), the problem is somewhere inside the laptop display. It could be bad connection, bad LCD cable or bad LCD screen.
Let’s narrow down the problem one by one.
The laptop screen receives data signal from the motherboard via LCD cable. If the LCD cable not making good connection with the motherboard, it might cause image or color distortion on the screen. Try reseating the LCD cable connector and see if it fixes the problem. Make sure the LCD cable connector plugged correctly.
In most laptops the LCD cable connector located under the keyboard bezel (aka keyboard cover). If it’s not there, most likely you’ll find it somewhere under the keyboard.
The LCD cable runs inside the laptop display, under the LCD screen. For this test it’s necessary to disassemble the display, so you can access the cable.
A pinched or damaged wire inside the LCD cable also can cause color distortion.

Try wiggling the LCD cable while the laptop is running. If wiggling the LCD cable affects image on the screen in any way (it starts shown different colors, lines, or image clears to normal, etc…) most likely the LCD cable is defective and has to be replaced. Try replacing the cable.
On the other hand, if wiggling the cable doesn’t affect image on the screen at all, most likely the cable is good and your problem related to the LCD screen failure. In this case you’ll have to replace the LCD screen.
Try applying some reasonable pressure to the top part of the display assembly. Squeeze it with your fingers
If the screen starts showing different colors, lines, or clears to normal when you squeeze the top part of the display panel, most likely this is LCD screen failure. In this case you’ll have to replace the LCD screen.

iPhone Troubleshooting: How to Restart, quit frozen apps and Reset iPhone

'm starting to think there is some sort of bad luck attached to my iTunes Store account, as tonight I experienced the third iTunes Store song that completely locked up an iPod - only this time it was my iPhone. While listening to 'Again with the Subtleties' from the Yppah album You Are Beautiful At All Times (US iTunes link) in my iPhone's iPod app, the phone completely locked up at the end of the track with an almost-faded out display. What was worse, the iPhone became completely unresponsive - the display wouldn't accept any of my taps, and even the external buttons were ignored. Momentarily wishing I could simply yank the battery to cut the power and reset the phone, I realized Apple must have some sort of a contingency in place for lock-ups like these.

Fortunately, I was right: The iPhone troubleshooting section of Apple's main iPhone support site contains a walkthrough for situations like this, complete with instructions on how to restart the phone, force quit a frozen app or reset the phone in cases like mine where it has completely locked up. Here are these steps in a nutshell:
    Restart your iPhone: Most people probably already know how to do this, but just in case, you can simply hold the sleep/wake button on the top for a few seconds to bring up a red slider at the top of the display which allows you to power off the phone.
    Quit a frozen iPhone app: I know it's a crazy thought, but it is entirely possible that Apple's wondrous iPhone apps can lock up from time to time. In this case, simply hold the Home button when in the app for about 6 seconds to kill the app. You should be able to jump back into the app without restarting the phone itself.
    Reset your iPhone: Note that this is not Restoring your iPhone; that's the button in iTunes that wipes the iPhone and all your information on it. Resetting an iPhone is nothing more than a hard reset or a forced reboot - you're simply cutting the power and making it reboot. To do this, hold the sleep/wake button and Home buttons simultaneously for a few seconds; the display will quickly wipe itself and you should see the black background and white Apple logo, signifying a reset well done.

Fortunately, that reset fixed my problem and I'm jamming again with my iPhone as I write this. Still, you can be sure that I'll ping iTunes support to find out what's going on with these files, as this is the third one I've downloaded from the iTS that's caused an iPod to stop dead in its tracks. Anyone else experience something like this? You know where to sound off.

How to test LCD screen inverter in a laptop

The screen inverter failure is very similar to the backlight lamp failure. In both cases the screen gets very dark and the image on the screen becomes very faint, barely visible under a bright light.
If you suspect the inverter board failure, I know only one reliable way to test that. It’s either replacing the inverter board with a known good one and see if it works, or connecting a known good backlight lamp and see if your presumably bad inverter lights it up.
In most cases I go with the second method – testing the laptop with a known good backlight lamp. Why? Because backlight lamps are pretty much universal. The same backlight lamp will work with many different inverters as long as they have matching connectors. I’ll talk about these connectors later.
The inverter board is located inside the display panel under the LCD screen. In most laptops you can access the inverter board if you remove the LCD screen bezel. The inverter board has connectors on both ends. The left side of the inverter is connected to the LCD cable. The right side of the inverter is connected to the backlight lamp which is mounted inside the LCD screen.
To make sure that inverter board is getting power from the motherboard (via the LCD cable), you can test it with a multimeter. In my case I connected the “+” lead of the multimeter to the pin 1 on the connector and the “-” lead to the ground trace around the screw hole. I got about 19.4V DC on that side of the inverter, so it’s getting power from the motherboard.
WARNING! If you accidentally short something on the inverter while testing it, you can damage the inverter or even the motherboard. Proceed on your own risk! Not sure? Don’t do that!

So, the inverter is getting power from the motherboard, but the screen is still dark. Apparently, it’s either bad inverter or failed backlight. Let’s test it with a known good backlight.
Here’s what I’m going to do:
1. I will unplug the LCD screen from the right side of the inverter. Basically, I’m unplugging the LCD backligth lamp which is located inside the screen.
2. I will plug in my known good backlight lamp which you can see on the picture below. Please notice that my test backlight lamp is shorter than the screen, but for the test purpose that’s OK.
Results I’m expecting:
1. If my test backlight lights up, the backlight lamp inside the screen is bad and there is nothing wrong with the inverter board. If that’s the case, you’ll have to replace the LCD screen
2. If my known good backlight lamp stays dark after I turn on the laptop, most likely we have a faulty inverter board. If that’s the case,
There are two different types of backlight connectors, you can see them on the picture below. The top one (big) is not as common as the bottom one (small). I do most of my test with a backligth lamp which has a small connector.
IMPORTANT! If you decide to buy a new backlight lamp for test, you have to make sure that the connector on the lamp matches the connector on the inverter. Very often backligth lamps are sold without any wires attached. If you plan to use this backlight as a test equipment,

Monday, November 19, 2012

How to make the iPad a better music device

I was at Apple's iPad launch on Wednesday, and maybe it was just Steve Jobs' reality distortion field, but I don't quite understand why the haters are piling on. A lot of PC-centric commentators are dismissing the iPad as an overpriced gadget, wondering why it's lacking features that are standard on even the cheapest notebook computers, like Flash support, multitasking, USB inputs to connect peripherals, and video outputs (HDMI would be nice). These are legitimate complaints--for a notebook replacement. But the iPad isn't a notebook replacement, and I don't think users will carry it with them on business trips. (Apple's iWork demo confused matters, admittedly.)

Instead, I agree with CNET's Ina Fried and Business Insider's Henry Blodget: this is a consumer electronics device for puttering around the house and leisure time--reading books and Web sites on the couch, showing pictures off to friends, catching up on the latest Web videos. And, yes, listening to music.t's also a golden opportunity for Apple to fix some of the glaring shortcomings in its portable music experience. Here are five things I'd like to see the iPad incorporate, perhaps through the next update to the iPhone OS (which it uses).

Wireless sync. The iPad is not a Mac. That means it doesn't run the full iTunes client, so you can't share music from another computer over your home network. Instead, like an iPod or iPhone, you must physically connect it to the computer on which your music is stored, then wait for the music to travel over the wire. This is, frankly, absurd. If you want me to use the iPad to listen to music in my home, don't make me walk over to my computer and attach it every time I want to load some new tunes. Wireless sync would also be great for syncing other material like pictures, videos, and apps. How hard can it be? Microsoft's Zune player has had wireless sync for three iterations and more than two years.

Cloud-based music service. Even if the iPad had wireless sync, the most affordable model has only 16GB of storage. This isn't enough for most music lovers' digital collections, especially if they're going to use the iPad for other functions like electronic books and photos. So how about taking that Lala acquisition and using it? Instead of having to load music onto the iPad itself, I could sync it from my computer to Lala's online music locker service, then stream it over the Web directly to my device. Bye-bye, storage limits. Best of all, every time I update my music collection, it's updated everywhere simultaneously. This is such a no-brainer I'd be stunned if Apple doesn't make it available shortly after the iPad launches.

Music-sharing with third-party apps. There are some surprisingly sophisticated DJ apps for iPhone, like TouchDJ and DJ Mixer, that let you play two songs at the same time and mix them together like a mulitrack DJ set-up. These apps would be much easier to use on the iPad's 9.7-inch screen. But they all share one big shortcoming: they can't just play songs that you've already loaded onto your device. Instead, you have to re-load songs into the DJ apps, either from a sync application running on your computer or over a Web server. This isn't the fault of the app designers--it's a limitation that Apple places on the iPhone and iPod Touch. I hope Apple figures out a way around it soon.

Queuing. I like to play DJ. As one song plays, it sparks associations with other songs. It would be nice to be able to load these other songs into a "now playing" queue. The Zune's had this feature since its inception, but I can't do it on the iPod Touch or the iPhone--instead, I have to wait for the current song to end, then start up a new song. (And no, I don't want to do this with playlists on the computer and then sync those playlists to the device. That misses the entire point of spontaneity.)

Decent speakers (and amp). Naturally, the first thing I did with the iPad was check out its music playback. I could barely hear it, even with the volume maxed out. It's true that the room was crowded with gadget fans scrambling for their first look at the device, but even so, the speakers sounded no louder than the iPhone's. But this isn't a phone. It's also not a Mac, where music isn't the primary focus for most users. It's a consumer electronics device. It would be great if I could set it up in my living room or bedroom without having to attach it to another device. Peripheral makers might complain--iHome does great work creating audio accessories for the iPhone--but if this is truly going to be a new product category, Apple should treat it like one. Alas, I'm going to have to wait for v.2 for this feature.

Stop Windows Blue Screen Error Caused by Device Drivers

When Windows detects a problem from which it cannot recover, it displays Stop messages. These are text-mode error messages that report information about the condition. Stop messages, sometimes referred to as blue screen of death (BSoD), contain specific information that can help you diagnose and stop blue screen error caused by a device or driver.

Find Out Which Type of  Blue Screen Error is Causing Your PC to Crash

BlueScreenView scans all files created during your minidump "blue screen of death" crashes, and displays information about all accidents at a table. For each accident, BlueScreenView shows the minidump file name, date and time of the accident, the accident shows basic information on the blue screen.
For each accident shown in the top pane, you can see the details of the device drivers loaded during the clash in the bottom pane. BlueScreenView pilots also mark their addresses found in the crash of battery, so you can find the drivers suspected that the probable cause of the accident

Fix Windows Blue Screen Errors
Reading the Blue Screen will just cause you confusing. It will only help to write down the STOP number near the bottom of the screen

Stop 0x0000009F or DRIVER_POWER_STATE_FAILURE (above screenshot)

Indicates that a driver is in an inconsistent or invalid power state, can occur after installing faulty applications or drivers or system services. For drivers, disable, remove, or roll back that driver to to determine if this resolves the error. If it does, contact the hardware manufacturer for a possible update. Using updated software is especially important for backup programs, multimedia applications, antivirus scanners, and CD mastering tools.

Stop 0x0000000A or IRQL_NOT_LESS_OR_EQUAL

If you encounter a Stop 0xA message, the problem might be due to an incompatible driver, system service, virus scanner, or backup.

Stop 0x0000001E or KMODE_EXCEPTION_NOT_HANDLED

The problem might be due to a memory leak caused by an application or service that is not releasing memory correctly.

Stop 0×00000024 or NTFS_FILE_SYSTEM

If you are not using the NTFS file system, and the system partition is formatted with the file allocation table (FAT16 or FAT32) file system there are write errors while pagin due the limit on FAT32. You can also resolve this situation by adding more RAM
Stop 0x0000002E or DATA_BUS_ERROR
Hard disk corruption can also cause this Stop message. The problem might also be due to cracks, scratched traces, or defective components on the motherboard. If all else fails, take the system motherboard to a repair facility for diagnostic testing.
Stop 0×00000050 or PAGE_FAULT_IN_NONPAGED_AREA
Defective memory (including main memory, L2 RAM cache, video RAM) or incompatible software (including remote control and antivirus software) might cause Stop 0×50 messages

Bad RAM


Several situations can lead to RAM-related performance problems with a particular machine:
RAM timing is slower than optimal machine spec.
RAM has minor flaws that appear only on detailed testing.
RAM is overheating.
There is insufficient RAM.

In the old days of Fast Page RAM, buying new RAM for your computer was a simple affair. You just needed to know what speed your motherboard supported and the maximum each slot would take. Today, there are many types and speeds of RAM, and the better motherboards may be tolerant of using RAM that does not match the motherboard’s maximum specs. For example, your motherboard may support PC133 RAM but will still work with PC100 RAM. But be aware that you may see performance decreases if you install RAM that is slower than the maximum spec. Some motherboards will even allow you to mix speeds but will default to the slowest RAM installed.

Minor flaws in RAM chips can lead to system slowdowns and instability. The least expensive chips often have minor flaws that will cause your system to slow down or Blue Screen intermittently. Although built-in mechanisms may allow the system to keep working, there is a performance hit when it has to deal with flawed RAM chips.

In the past, no one worried about RAM chips getting hot, because they didn’t seem to generate much heat. But that’s changed with newer RAM types, especially SDRAM. To check for overheating, open your computer’s case, power down, and pull the plug out. Ground yourself and touch the plastic on one of your RAM chips. Ouch! They get pretty hot. If you find that your RAM chips are overheating, you should consider buying a separate fan to cool your memory. If your motherboard doesn’t support a RAM fan, you might be able to get enough additional cooling by installing a fan card that plugs in to a PCI slot.

Of course, one common reason for poor performance that’s related to RAM is simply not having enough of it. Modern operating systems such as Windows 7 and today’s resource-hungry applications, combined with our increasing tendency toward extreme multitasking, result in a need for more RAM. The minimal specified system requirements may not cut it if you’re doing lots of multimedia or running other memory-intensive applications. 32-bit Windows is limited to using 4 GB of RAM, but 64-bit Windows 7 can handle from 8 to 192 GB, depending on the edition. If your system allows, adding more RAM can often increase performance.

Processor overheating

Chipmakers have recently been working to make processors more efficient, which means they generate less heat. Nonetheless, some modern processors still generate a lot of heat. That’s why all processors require some sort of cooling element, typically a fan of some type. A system’s Thermal Design Point (TDP) rating indicates, in watts, how much heat it can safely dissipate without exceeding the maximum temperature for the chip. When the processor temperature goes over spec, the system can slow down or run erratically (lock up) or may simply reboot. The processor fan may fail for several reasons:
Dust is preventing the fan from spinning smoothly.
The fan motor has failed.
The fan bearings are loose and jiggling.

Often, you can tell if there is a fan problem by listening and/or touching the computer. A fan that has loose bearings starts jiggling and vibrates the case, making a characteristic noise. As time goes by, the sounds and vibrations will become so prominent that you’ll change the fan out just to regain some peace and quiet.

You don’t always need to replace the fan. If it is covered with dust, you can often spray away the dust with compressed air. But even though you might get the fan running again, its life span has likely been reduced because of the overwork. You should keep an extra fan in reserve in case of failure.

Processors may also overheat because the heat sink is not properly placed above the processor or the thermal paste is not of good quality or was applied incorrectly (or not at all) when the system was built. This is more likely to be a problem with home-built systems but can happen with commercially manufactured ones as well. The paste can break down over time, and you may need to reapply it.

Case design is another element that can contribute to or help prevent overheating. Cases with extra fans, better vents, and adequate room inside for good airflow may cost more but can provide superior cooling performance. Small cases that squeeze components together can cause overheating. For this reason, laptops with powerful processors are prone to overheating.

Wednesday, August 22, 2012

How to fix a broken G4 iBook

There is a problem with the logic board in the Macintosh G4 ibooks. It can appear after a year or more in some machines and the symptom is that after being on for a few minutes, the screen goes black (it looks blank, but the light has gone off) , the fan turns on, and the computer freezes. You might think it is a problem with the display but it’s actually a problem with one of the chips on the main motherboard. This article describes the problem and how to repair it.


What models are affected?

I conducted a survey (thanks to over 300 readers who participated!) to see which model g4 ibook had the problem.  The results are here and it appears that every  iBook model can develop the blank display problem.

Thankfully the Aluminium power books don’t have the problem. In fact the powerbooks from this era are a great design, the 15 inch Aluminium G4 powerbook is one of my all time favourite macs – I still have one.

The original 2003 ibook G4′s (800/933/1Ghz) have the fault.

The “Early 2004″ (1Ghz) models up until Oct 2004 have the same motherboard.

The 60G (1.2Ghz) “Early 2004″ model and all the “Late 2004″ model ibooks (1.2Ghz/1.33Ghz) and Mid 2005 (1.33 and 1.42Ghz) have  different logic board (built in airport extreme)-  but they still have the fault – even models with the new logic boards are affected!

What is the fault?

One of the chips heats up and cools down each time the computer is turned on and off, so that eventually a small stress crack appears on one of the pins. When the computer heats up and parts expand, the crack opens up and the power does not get through. This means the display goes blank and the computer freezes. If you press the plastic case of the ibook in just the right place, it can put enough pressure on the chip so that the pin makes contact and the computer will power up again. In fact, here’s a crude DIY repair method involving a shim where you open the laptop and put a piece of rubber on top of the chip to press it down

The repair!

You need a fine tipped soldering iron to heat up the top few pins of the chip one by one and resolder them to the logic board. Press the chip down while you apply a very clean and fine soldering iron tip to each pin.
Don’t attempt this one unless you have had some soldering experience – or you are ready to say goodbye to your G4 ibook if something goes wrong!
Here are some pictures:

Computer with bottom case off 

The G4 ibook with the bottom case off. The offending chip is circled.

ibook with bottom case off
Closeup of chip
Here is a closeup of where I have soldered the legs of the chip. You can see the base of the top pins are shinier and a little fatter from the new soldering. I soldered the top 3 or 4 pins on each side, but it’s only the top 2 pins that the fault occurs with as they are the main power pins. I applied a little more solder to the joint as well, that’s why it looks a bit lumpy.
TYou don’t need to apply any new solder to the chip. Just apple some solder to your soldering iron to clean it. Then wipe the iron clean on a rag. Then gently touch the iron to the legs of the chip for about 3 seconds each leg to melt the solder down onto the joints again.
Here is a close-up of the chip you are soldering.  Solder the end with the little circle on it. Solder the top 2 legs on each side.


STOPPING THE FAULT FRM OCCURRING

 
As pointed out in the discussions below, once your ibook is fixed,  or if your G4 iBook has not yet developed the fault,.
It turns your fans on earlier and lowers the internal temp of you ibook. You can set the temperature lower so that your fan turns on a little sooner to keep the iBook cooler.
If you repair your iBook be sure go make a post below. So far there have been lots of successes and no failures at all!

Tuesday, August 21, 2012

Fix Error 3194 from iTunes during iPhone restore


If you run into Error 3194 within iTunes when you are trying to restore your iPhone, iPad, or iPod touch, you can fix it by temporarily blocking Apple’s firmware signing services. Error 3194 seems to be triggered when unsigned firmware is used, often during an iOS downgrade or even during some restores. Here’s how to resolve the error:


Fix Error 3194


The fix is the same regardless of what operating system you are using:

    -Quit iTunes
    -Locate your hosts file, in Mac OS X this is /etc/hosts and in Windows this is c:\windows\system32\drivers\etc\hosts
    -Open the hosts file with Administrator privileges
   - Add the following lines to the very bottom of the hosts file:
    74.208.105.171 gs.apple.com
   - Connect your iPhone to the computer
  - Launch iTunes
   - Put the iPhone/iPad/iPod into DFU mode by turning the phone off and then holding down the sleep and power button for 10 seconds, then release the power button but hold onto the home button until iTunes tells you that the device is now in recover mode
    -Use the iTunes Restore feature as usual with the iOS device

Saturday, August 18, 2012

How to Use a VGA iPad Adapter to Play a Slide Show

The Photos app included with all Apple iPads is a great way to browse through digital images stored on the touchscreen tablet and display picture slideshows of your favorite digital memories. If you want to connect your iPad to a TV or computer monitor with a VGA input, you can connect the two using the iPad VGA adapter and VGA cable (sold separately from the iPad) and view your slideshow on both the iPad and the larger screen in just a few quick steps.

Step 1

Power on the iPad by pressing the "Power" button. Tap the "Photos" app to open it. Preview icons of all digital images stored on the iPad appear.

Step 2

Connect the iPad VGA adapter to the iPad at the connector port underneath the iPad's "Home" button. Connect one end of the VGA cable to the iPad's VGA adapter. Connect the other end of the VGA cable to your TV or computer monitor's VGA input port. Turn on the TV or computer monitor and set it to display input from the VGA port.

Step 3

Tap the "Slideshow" button in the upper-right-hand corner of the iPad screen. The Slideshow Options menu appears with the default settings. By default, the "Play Music" setting is set to "On" and the "Transition" setting is set to "Dissolve." Touch the Slideshow Options menu to make changes if, for example, you'd prefer to play the slideshow without music or if you'd prefer to change how the images will transition from one to the next.

Step 4

Tap the "Start Slideshow" button. The slideshow begins to display the iPad's photos on both the iPad screen and the TV or computer monitor.

Saturday, August 11, 2012

How to Disable a Built-In VGA Card on an MSI

If you have or plan to install a new graphics card onto your MSI brand motherboard, you may need to disable the integrated graphics adapter to ensure proper functionality. While many of the MSI boards will automatically disable the onboard adapter after you have installed a graphics card, others may require you to disable the onboard card for the BIOS to read your new graphics card's firmware. In cases where you're unable to disable integrated graphics on the MSI motherboard, you can disable the adapter in Windows Device Manager.

Disable in BIOS

Step 1

Turn on your computer. Repeatedly press the key indicated next to "Enter Setup" to access the BIOS. The BIOS on most MSI motherboards is accessible by pressing the "Delete" key.

Step 2

Use the "Arrow" keys to select "Integrated Peripherals." Look for "Onboard VGA," "Onboard Graphics Controller" or other similar text. Use the "Arrow" keys to highlight the option and then use the "Page Up" key to select "Disabled." Press the "F10" key to save and exit. Continue to the next step if you don't see a setting similar to these.

Step 3

Press the "ESC" key once. This takes you back to the main BIOS screen. Use the "Arrow" keys to select "Advanced Chipset Features." Look for "VGA Share Memory," "Shared Graphics Memory," or other similar text. Use the "Arrow" keys to highlight the option and then use the "Page Up" key to select "Disabled." Press the "F10" key to save and exit. If you don't see any options similar to these, you can still disable the onboard graphics card in Windows Device Manager.

Disable in Windows Device Manager

Step 1

Press the "Windows" and "R" keys simultaneously. The Run dialog subsequently opens.

Step 2

Type "Devmgmt.msc" in the "Run" dialog and press "Enter." The Windows Device Manager is subsequently displayed.

Step 3

Double-click "Display Adapters" and right-click your onboard VGA.

Step 4

Click "Disable" and click "Yes" to confirm. The onboard VGA is now disabled.

Wednesday, August 8, 2012

.NET Framework Error

Framework errors generally fall into two types:

    1-After applying an update
    2-When launching any Office application


  A framework error normally means one or more components of Office have not been updated correctly and are now out of synch with other bits.

If you receive a framework error after applying an update, try the following steps. Test after each step to see if problem is fixed.

    Move the Microsoft User Data folder from Documents to the desktop. Let Entourage create a new blank one. If the problems go away, you can copy needed files from the removed MUD folder. Your mail is stored in the Office xxxx Identities folder. Verify permissions on folders.
    Re-apply recent Office updates.
    Download the combo updater from Apple and run it again rather than using Software Update. Doing so overwrites potentially problem-causing files.

If you are still having problems.....

Use "Remove Office" to remove files. "Remove Office" is an application found in the Microsoft Office Additional Tools folder. "Remove Office" removes both preference files and custom templates, so you should make a backup copy of the preferences and templates in another location on the machine before running the removal tool. You'll also need your CD key when you re-install.

    -Install from CD
    -Restart and Repair Permissions
    -Apply All updaters (After your computer restarts, use AutoUpdate to check for updates, and then download and install the Updates or download standalone updaters from Mactopia)
    Restart and Repair Permissions

Notes:

Eject your Time Machine drive to speed up the installer looking for volumes with Office installed. During the install process if it appears to stall with a spinning rainbow, give it some time, then some more time and lastly even more time. It will eventually come out of the apparant crash and finish.

Using "Remove Office" does not delete your Microsoft User Data folder that contains your email messages. Remove Office does not remove any documents or personal settings you have saved. However, there are rare cases after running an installer where data goes missing. Making a backup is always advised when updating software. The folder you need to backup is your Microsoft User Data folder located in Documents.

YOUR USER FOLDER/Documents/Microsoft User Data


Archive and Install Basics:

1) Insert the Mac OS X Install Disc and double-click the Install Mac OS X icon.

2) Follow the onscreen instructions. In the pane where you select the destination disk, select your current Mac OS X disk (in most cases, it will be the only one available).

3) Click Options. If you want to save your existing files, users, and network settings, select “Archive and Install,” and then select “Preserve Users and Network Settings.” If you want to erase everything on your computer and reinstall Mac OS X, select “Erase and Install.” You can’t recover erased data.

4) Click Continue.

5) Click Customize to select which parts of Mac OS X you’d like to install, or click Install to perform a basic installation (recommended).

Once the install has finished, your system will be at whatever level the disk you have is. So if your Install DVD/CD disk is 10.5.0, that's what version of OS will be on your Mac. You will need to download the appropriate Combo Updater from Apple's site to restore the system to a higher version. After you run the combo, allow Software Update to download and install any additional updates.

Lastly, in rare cases, some users have had to do an "Erase & Install" of their system files.

Friday, August 3, 2012

How to Check the Health of your Hard Drive

Hard disk failure is possibly the worst thing that can happen to your computer and it often occurs without giving any warning signs.


Test Your Hard Drive for Impending Problems

hard diskYou may however run certain tests on your computer beforehand to get an idea about the current condition of your hard disk. This should in turn help you decide whether a replacement drive is necessary or not.

Step 1: Check your hard disk for errors

All recent versions of Windows include a utility called Chkdsk.exe that can check your hard disk for any bad sectors.

You may either run Chkdsk from the command line (see details) or launch Windows Explorer, right click the drive that you wish to examine and choose Properties. Switch to the Tools tab and click the “Check Now” button under Error checking. Select “Scan for and attempt recovery of bad sectors” to perform a thorough disk check.

Step 2: Understand the sounds of your disk

Do you sometimes hear strange sounds coming out of the CPU box? Well, if the hard drive is making those sounds, it could be an alarming situation and your best bet would be that you turn off the computer before any further damage is done to the disk.

But how do you distinguish between sounds coming from a hard disk with noise that’s made by the fans or the power supply? Here's a useful page where you can listen to recorded sounds of various hard drives that have lead to a crash. If your disk is making a similar sound, get a replacement quickly.

Step 3: Catch errors before they happen

Disk Checkup is a free hard disk monitoring utility that displays tons of diagnostic data about your disk. While the level of detail it provides may easily confuse even tech-savvy users, just ignore the numbers and keep the utility running in the background.

It monitors your disk’s temperature, read and write error rate, etc. and will alert you when the values of any of these parameters approach dangerous levels. These may be signs of an impending disk failure. Disk Checkup is free for personal use.

Step 4: Thoroughly test your Hard Disk

SeaTools is free diagnostic tool that can completely test your hard drive regardless of the OS installed on it. The tool is provided by Seagate but it works with non-Seagate  disk drives as well.

To get started, you need to download the ISO image of SeaTools for DOS and create a bootable CD. Now boot the computer with the CD in the drive, accept the license agreement and run a long test (the full scan). If any defects are found, a list will be offered at the end or after aborting the disk scan.

Other computer vendors /disk manufactures including Samsung, Hitachi, Toshiba (Fujitsu), Western Digital, Lenovo, Dell, etc.  too offer diagnostic tools that work only with their own brand of hard drives. If you are having frequent computer problems (like system hangs or fails to boot up), you may run these tools to confirm if the problems are hard drive related.

Important: While these tools can help you diagnose your hard drive's health, they are still no good substitute for regular backups.

How to Troubleshoot a Stop 0xC0000218 Error Message

A Stop 0xc0000218 error message means that a necessary registry hive file could not be loaded. This error message can occur if the file is corrupt or missing. To resolve this issue, you can reinstall the operating system and restore the registry files from a backup. The registry files may have been corrupted because of hard disk corruption or some other hardware problem.

This error message can also occur if the driver has corrupted the registry data while loading into memory, or the memory where the registry is loading has a parity error. In the latter case, turn off the external cache and check the memory chips. 

To resolve this issue, follow these steps:
 
-Start your computer by running the Recovery Console, run the chkdsk /p command on the drive, and then restart your computer. -Test to determine whether the issue is resolved. If the issue is resolved, do not complete the remaining steps. If the issue is not resolved, go to step 2.
 -When Windows loads, press SPACE BAR when the "Load Last Known Good" message appears.
    Complete a parallel installation, and restore the registry files from a tape backup. To do so:
       - Reinstall Windows in a separate folder.
       - Restore the damaged registry hive from backup. This procedure is specific to the backup application that you used to make a backup. Consult the documentation of your backup application or consult the vendor if you need assistance. Typically, this procedure requires you to restore a system state backup to an alternate location, and then copy the appropriate registry files to the %SYSTEMROOT%\System32\config folder of the damaged operating system.
        If you do not have a tape backup, include the backup of network servers and production workstations.
    NOTE: If Windows is stored on a FAT partition, you can restore the files by using another computer and by copying the registry hive files to the %SYSTEMROOT%\System32\Config subfolder.
If the Stop error message was caused by a hardware problem (for example, bad sectors on the hard drive), the drive may require a low-level format, repartition, reformat, and a restore of the entire system from a tape backup to clear up the problem. Although this would be the most drastic case, if the Stop error message was caused by a physically bad sector, the sector must be relocated with a low-level format.

Sunday, July 29, 2012

WJView Error on Start Up


Wjview lets you view window-based Java applications. A possible cause of the error message is if Wjview attempts to start an application on your system that no longer exists. To check this, perform the following steps:
1. Start Msconfig.
2. Select the Startup tab.
3. Scan the list for any entries that contain "wjview."
4. If you find any "wjview" entries, try disabling the Wjview startup
component and locate any associated folders identified in Msconfig that you
might need to delete to determine whether that solves the problem.
To delete the "wjview" entries rather than disabling them (and to check
under non-XP OSs), perform the following steps:
1. Open a registy editor (e.g., regedit.exe).
2. Navigate to the
HKEY_LOCAL_MACHINE\SOFTWARE\Microsoft\Windows\Curr entVersion\Run
and
HKEY_CURRENT_USER\Software\Microsoft\Windows\Curre ntVersion\Run registry
subkeys.
3. Remove the invalid "wjview" entries.

Note you can save the registry key first by:

On the File menu, click Export.
In the File name box, type SaveKey, and then click Save.
Or create a system restore point prior to editing.
Note: If the registry key is not there, you can simply create one by going
edit > new.

Saturday, July 28, 2012

How to Fix DLL Errors

Windows uses rundll files to load programs, files and applications. If the dll file is missing or corrupted, any application using that file cannot be loaded. This will produce a rundll error. The reason why the file has gone missing is often linked to spyware or a virus. This kind of malware often tries to hijack the files being shared by the rundll file. The other programs sharing the file then do not operate efficiently or wont load at all.
 

- Reinstall The Program

In some instances, DLL errors are a result of a problem with an individual program. Generally, you can pinpoint the program that's causing the error because when you try to use the program, the DLL error pops up.

For example, if you're receiving DLL errors every time you try to run Microsoft Word, you're almost certainly dealing with a problem with Word. Reinstall the program then head to the software manufacturer's Web site to search for program patches or updates.

Often reinstalling the program does the trick because when you reinstall the program, you're also reinstalling the DLL file.
    
-Run Your System Restore Utility

The system restore function is often a lifesaver, especially when it comes to dealing with DLL errors. Initiate a system restore, making sure the restore date is prior to when the DLL error occurred. A system restore should correct the DLL error.

Unfortunately, however, there will be times when a DLL file will make it impossible for you to get Windows running normally. Should that be the case, start your computer in safe mode then run the system restore.

-Run a System Virus Scan

If you have an anti-virus program – like Norton Anti-Virus or McAfee – run it. If you don't, get one as soon as possible , and run it on a regular basis.

Often, you can find the source of your DLL problems with a simple scan. It's common for DLL errors to occur as a result of spyware and viruses. Anti-virus programs will locate and eliminate problems, which should fix your DLL error.

 -Check For Updates & Download Them

Sometimes DLL errors occur when you install a new program. For example, you might download FrontPage and start receiving DLL errors. When that happens, head to Microsoft's Web site and look for any program updates. If there are updates, download them.

If you don't find any program updates and patches, you should uninstall the program. It's likely the DLL error will go away when you uninstall the program.

Still, you'll have to deal with the problem of not being able to run the program properly on your computer. To help solve that problem, contact the software manufacturer's technical support.
    Search Online For a Solution

Every computer user has to deal with DLL errors, so you're not alone. In fact, some computer experts recommend searching online for the answer to your DLL problems.

For example, you may be getting a DLL error telling you a particular DLL file is missing. In that case, head to your favorite search engine and search for a download of the missing DLL file.

If you're getting a WMPDXM.DLL error, go to Google and search for "WMPDXM.DLL download." Oftentimes, you'll receive dozens of hits. Choose a site then download the DLL file, and your problem should be solved.

Ultimately, while DLL errors can be annoying and time-consuming, there are numerous simple ways you can fix the problems. The key is understanding what you need to do and taking that action to ensure your computer begins to run smoothly again.

How To: Delete Un-Deletable “Access Denied” Files or Folders in Windows

Windows98/200/ME
 Many times when trying to remove an unwanted program, especially a piece of adware or spyware, you may run across a file that is undeletable by any normal method. When you try to remove it you'll receive the error message shown below telling you "access denied" and explaining the file may be in use. You may also receive one of the following messages.

-Cannot delete file: Access is denied
-There has been a sharing violation.
-The source or destination file may be in use.
-The file is in use by another program or user.
-write-protected and that the file is not currently in use
.


the easiest way to remove an undeleteable file is to boot to a DOS prompt and manually delete the file. Before you do this, you'll want to make a note of the location of the file including the entire path to it. Follow the steps below to delete these types of files.


  -Click on Start, Find, Files and Folders
  -Type the name of the undeletable file in the Named or Search For  box
   - Make sure the Look In box shows the correct drive letter
    -Click on Find Now or Search Now and let the computer find the file
    -Once the file is located, right-click on it and choose properties, make a note of the file location. Usually this is something similar to

    c:\windows\system32\undeleteablefilesname.exe

   - Close the search box
    -Locate a boot disk for your version of Windows, if you do not have a boot disk, follow the steps on the link below to create an emergency boot disk.

    How to Create an Emergency Boot Disk for Windows

    -Shut down and restart your computer with the boot disk in your floppy drive.
    -The computer will boot to a DOS prompt that will look similar to

    c:\

    Type the following command and press Enter to delete the filer, substituting the phrase <path to file> with the actual path and file name you discovered in Step 5 above.

    del <path to file>

    Example: del c:\windows\undeleteablefile.exe
   -Remove the boot disk in the floppy drive and restart your computer
   -The file should now be deleted.

Windows XP

 
In Windows XP, there are a couple ways to remove an undeleteable file, a manual way, and a couple automated ways using some freeware programs. First, I'll show you the manual way.

Manual Method

If you already know the path to the file, please skip to Step 7

    Click on Start, Search, All Files and Folders
    Type the name of the undeletable file in the box shown
    Make sure the Look In box shows the correct drive letter
    Click Search and let the computer find the file
    Once the file is located, right-click on it and choose properties, make a note of the file location. Usually this is something similar to

    c:\windows\system32\undeleteablefilesname.exe

   - Close the search box
    -Click on Start, Run, and type CMD and Press Enter to open a Command Prompt window
   - Leave the Command Prompt window open, but proceed to close all other open programs
    -Click on Start, Run and type TASKMGR.EXE and press Enter to start Task Manager

    -Click on the Processes tab, click on the process named Explorer.exe and click on End Process.
    -Minimize Task Manager but leave it open
   - Go back to the Command Prompt window and change to the directory where the file is located. To do this, use the CD command. You can follow the example below.

    Example: to change to the Windows\System32 directory you would enter the following command and Press Enter

    cd \windows\system32

    Now use the DEL command to delete the offending file. Type DEL <filename> where <filename> is the file you wish to delete.

    Example: del undeletable.exe

   - Use ALT-TAB to go back to Task Manager
    -In Task Manager, click File, New Task and enter     EXPLORER.EXE to restart the Windows shell.
    -Close Task Manager

Friday, July 27, 2012

How To Fix Rundll32.exe Errors

The reasons behind rundll errors are numerous and intriguing. Where do they come from? What are they? How do I get rid of them? These are all very good questions to ask. Unfortunately, no simple answers exist.

Rundll errors can originate from a number of sources including viruses, buggy software, spyware, or drive errors. A faulty installation, one that has not been completed or did not install properly, can also be at the root of the problem. Moreover, an uninstall of a program that has been performed incorrectly or incompletely may also be the cause of rundll errors. Additionally, undetected spyware may be responsible for the rundll errors occurring on your computer.

A rundll32 error is often caused when Windows attempts to load a file but is unable to do so. A message indicating that a rundll error has occurred usually appears on the computer screen. Whenever Windows cannot load a file because it cannot locate it, a rundll error has occurred.

In order to solve the problem, it is often necessary to go through a series of possible solutions or fixes to the problem. The first and most basic step is to do a simple reboot of your computer. If this does not seem to solve the problem, continue to the next possible fix.

If the rundll error has occurred because of a faulty uninstall, the next thing to do is to completely redo the uninstall. How do you know if this is the problem? Actually, you don't, but you can consider it, if you recently attempted to uninstall a program. To uninstall the program again, you will first need to reinstall it. Now, carefully perform a new uninstall of the program. If this solves the problem, you are in the clear. If not, continue troubleshooting.

If you have an up to date anti-spyware application, run it now. Since spyware, adware, and malware are constantly evolving into newer and more insidious versions, it is extremely important to maintain a current version. If the rundll errors continue to occur, attempt to do a clean boot
.
 
 
Complete the following steps in order to perform a clean boot on your computer.

  -  Click start to open the menu.
  -  Click run.
  -  Type 'msconfig' in the input field.
  -  Click ok. The System Configuration Utility should open.
    Once the System Configuration Utility opens, choose the selective startup option by clicking in the small circle in front of it. Deselect all but one choice listed below it. It doesn't matter which one, because you will need to do this until you have covered each one of the choices.
    -Click ok.
   - Reboot your computer.
    Once this process identifies the item that is at the root of the rundll problem, you move to the next step. Select the tab at the top of the System Configuration Utility Window that corresponds to the item that has been identified.
   - Deselect all but one of the choices below the tab.
    -Reboot your computer. If the computer reboots without any problems, continue the process of elimination. Deselect different scenarios until you identify the problem. Reboot.
    Once you identify the problematic item, you are finished with this procedure

Install Memory RAM

Install Memory RAM

This guide will take you through the process of performing a RAM upgrade.

This section refers to installing DIMM memory modules into your computer, step by step with the aid of photos.

To install your memory you will need:

    Compatible DIMM memory module/s.
    Cross-point (Philips) Screwdriver suitable for your PC case.
    Anti-Static Wrist-strap
Locating the DIMM slots
 
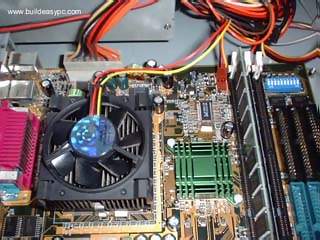
After removing the cover, the first thing to do is to locate the DIMM slots on your motherboard. fig. below gives you an idea of what you are looking for
Unless you are installing a new motherboard, then your slots will already have at least one dimm module installed. If this is the case, then install the new memory module into the empty slot next to the module that is already installed.

If your motherboard does not have any memory installed, then refer to your motherboard's manual for details about which slot to use.

note: Motherboards vary, although there are three slots in our example, your motherboard may have a different amount of slots
 
Install your new module(s.
  • Take your module out of its anti-static bag and hold it by the edges.
  • If you have more than one open slot, fill the lowest numbered slot first. If you can't see any numbers on your motherboard, use the slot that is closest to the filled slot(s).
  • Line up the notches in the row of gold pins at the bottom of your module with the keys in the DIMM slot on your motherboard. (If the notches don't line up right away, flip your module around and try it the other way. It doesn't matter which side of your module has the black chips or the stickers on it. The important thing is to line up the notches.)
Place memory module in DIMM slot
Press module into slot
  • Use your thumbs to press the module into the slot. Press hard! It takes about 20 pounds of pressure to get the module properly inserted in the slot. This may mean you press harder than expected — but keep the pressure on! When you hear a "click" and both side ejector clips snap up around the module, you know it is installed correctly.
Tip: Try to avoid touching the gold pins at the bottom of your module. You probably won't harm them if you do touch them, but it's better to be safe than sorry.

Installing a PC computer processor

Always make sure you ground your self before touching the processor and motherboard. If you give the processor / motherboard a static shock you could break them. There are a few different types of processors. I am going to show you how to install a Pentium 4 processor. 
Just below is a picture of a motherboard. The processor slot is located at the top centre inside where the orange square is.

All processors will only go into the slot one way, So make sure you know what way it goes in. Look at the pins on the processor and then line them up and slot the processor to the motherboard. It will be obvious which way it goes in.
Before you slot the processor in pull the metal lever up  , This will open the little slots and will alow the processor to slot in. Now slot the processor in, Make sure you do not bend any of the pins on the processor and never force it in. If you force the processor in you might risk bending the processors pins. When the processor is in place pull down the metal lever. Make sure the processor is in the slot properly and does not move. 


How To Install A Processor
All processors will get very hot when you turn on your computer, so you will need to install a heatsinker and fan to cool the processor down
 
Install A Heat sinker and Fan
  
 
the heatsink and fan is one of the most important components in the system. If this is not installed correctly your processor will frequently overheat and eventually break. So always try to buy a descent heatsink and fan. Follow the steps below to install a heatsink / Fan.

Check the processor is firmly in its slot, make sure it doesnt move from side to side. With the heat sink you should of got some compound . Wipe this compound on to the top of the processor. Have a look around the rim of the slot there will be two notches. Place the heatsink and fan on top of the processor, There will be a metal strap which will connect to the two notches, Connect one side at a time. As soon as one is done, Do the other side. (Shown below)
How To Install A Processor

When the heatsink and fan are on, gently move the heatsink left and right. If you have installed correctly it wont move much. Then finally there will be a cable coming out of the fan, Connect this to the fan power supply on your motherboard. You can use your motherboard manual to locate this


To allow the most effective conduction between the heatsink and the CPU, a thermal conducting compound is used between the CPU die and the heatsink. This is because the more contact between the die and the heatsink, the better the transfer of heat will be.
Even flat objects that appear to be in full contact might have limited points of contact, due to the roughness of the surfaces at a microscopic level. It’s estimated that only 1% of the surfaces may actually be in contact when two flat metal parts touch each another! The remaining space is filled with air, which is a poor thermal conductor. Thermal compound fills in these gaps of contact and greatly increases the efficiency of the heatsink.
Proper use of a thermal compound between the CPU and heatsink is absolutely necessary for proper cooling of the CPU. If your CPU and heatsink instructions tell you to use a thermal compound, do not omit this step.
Thermal compound comes in two forms. First is thermal grease, which looks just like any other thick liquid. If thermal grease is used, you simply place a drop of thermal grease on the die before installing the heatsink. Use a drop just about the size of a small pea and place it at the center of the die. As the heatsink is installed, it is pressed down and the thermal grease will compress and flatten out.
Second, and a better, less messy method, is a thermal tape applied to the heatsink that comes with the heatsink. Examine your heatsink and your heatsink instructions to see which method is used. If your heatsink has a strip of thermal tape on it, you don’t need to use thermal grease. The tape is used instead of the grease.
If your heatsink has a thermal tape applied to it, remove the cover of the tape just before you install the heatsink. Don’t allow the thermal tape to be exposed for a long period of time before doing the installation. You don’t want it to attract dirt.
If you ever need to remove the heatsink from the CPU, which originally had thermal tape and then reinstall the same CPU and heatsink (you probably will never need to do this), you’ll need to scrape off all of the thermal compound from the heatsink. Because the material will fill in the pores at the microscopic level, you’ll never remove all of the old material. But, try to remove all visible material. Then, you’ll apply new thermal material